Follow Me On Social Media!

Oreo Truffle Balls: Indulge in This Chocolate Delight!
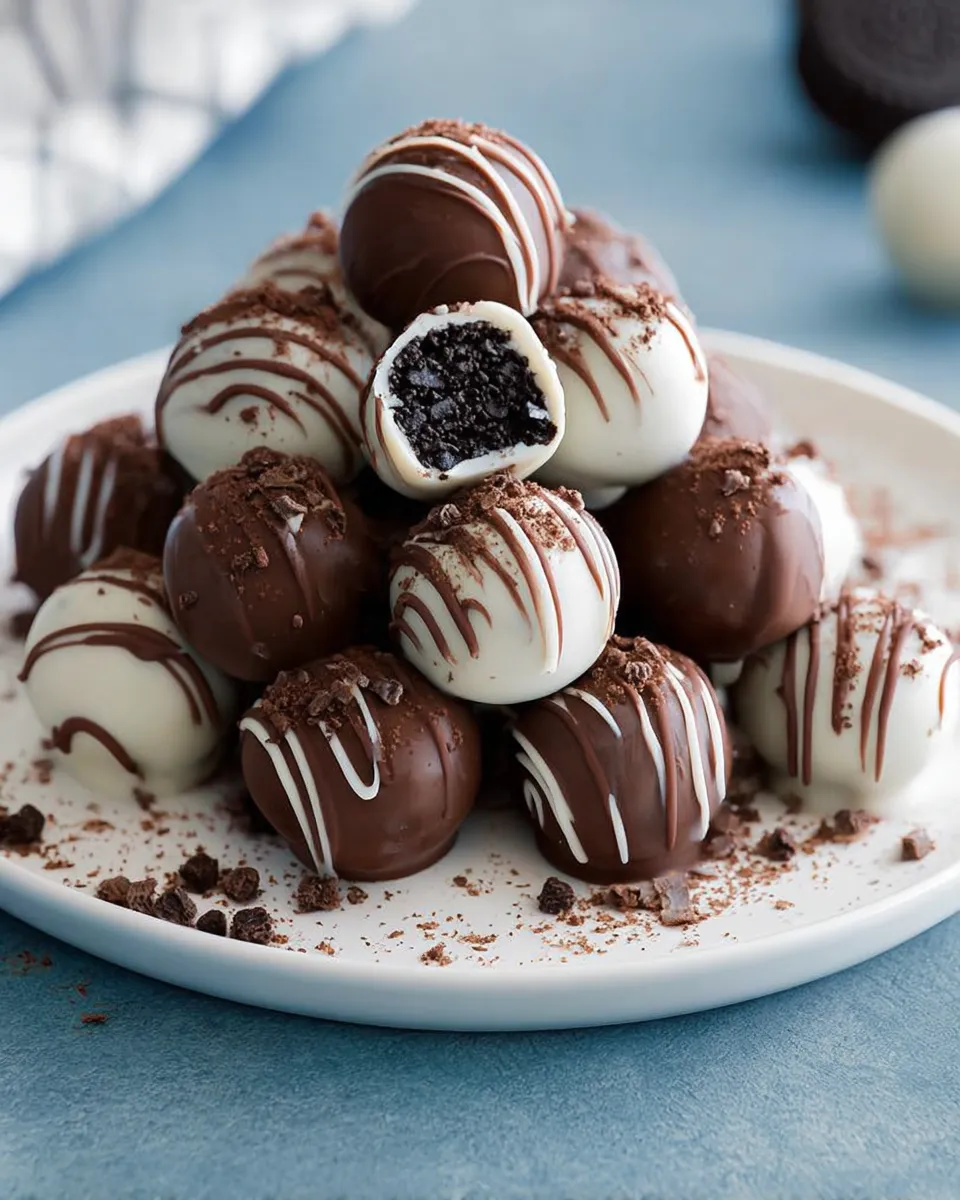
Are you ready to indulge in an easy yet irresistibly delightful treat? Oreo truffle balls are the perfect combination of creamy, crunchy, and sweet—all rolled into one bite-sized delight. These delectable confections are made by combining crushed Oreos with cream cheese, creating a rich filling that melts in your mouth. Coated in chocolate, these little gems not only satisfy your sweet tooth but also impress your family and friends at any gathering.
What makes these chocolate-covered delights even more appealing is their versatility. You can easily customize your oreo truffles by adding toppings, flavorings, or even varying the type of chocolate used for coating. Whether you’re planning a birthday party, holiday celebration, or just a cozy night in, these delightful balls of goodness will be a hit. In this article, we’ll guide you through the simple steps of creating your own batch of delicious Oreo-inspired truffles. Get ready to bring some joy to your taste buds!
What Makes These Treats Irresistible:
If you’re on the lookout for a delightful sweet treat, then look no further! Oreo truffle balls are not just an indulgence; they are pure happiness wrapped in chocolate. The combination of rich chocolate and creamy filling creates a dessert that is not only visually appealing but also wonderfully satisfying. With only three ingredients, they are super easy to make, making them perfect for any occasion.
Easy to Prepare
The simplicity of this recipe is one of its best qualities. All you need are Oreos, cream cheese, and chocolate to coat your truffles. Just crush the Oreos into fine crumbs, mix in softened cream cheese, form the mixture into balls, and finally, dip them in melted chocolate. It’s a straightforward process that even novice bakers can master. If you fancy trying more easy yet delicious recipes, check out this refreshing coleslaw broccoli salad for a delightful twist on your typical salads.
Decadent Flavor
The flavor profile of these truffle balls is simply irresistible. The crunch of the Oreos paired with the smoothness of the cream cheese creates a delightful contrast. To amplify the flavor, consider adding a dash of vanilla or sprinkling some sea salt on top after dipping in chocolate. This sweet and salty combination heightens the dessert experience, making your Oreo truffle balls truly decadent.
Perfect for Any Occasion
Whether it’s a birthday party, holiday gathering, or just a weekday treat, these truffles are versatile enough to suit any event. They are bite-sized, making them easy to serve and share with friends and family. If you’re looking for ideas on more fun desserts to impress your guests, you might enjoy making apple cider whoopie pie cookies for their festive flair.
In conclusion, Oreo truffle balls combine convenience with flavor, pleasing both the sweet tooth and the busy chef. The ease of preparation, delicious flavor, and suitability for various occasions make them truly irresistible. Treat yourself or your loved ones to these fun and indulgent bites; you won’t regret it!
Ingredients for Oreo Truffle Balls:
Creating delightful Oreo truffle balls is a simple process that requires just a few ingredients. Here’s what you’ll need:
- 36 original Oreo cookies
- 1 (8 oz) package cream cheese, softened
- 16 oz vanilla or chocolate candy melts (or melted white chocolate, milk chocolate, or dark chocolate)
- 3 additional Oreos for optional topping, crushed
How to Make Oreo Truffle Balls
To start, line an 18 by 13-inch baking sheet with wax paper or parchment paper. This will ensure your truffles don’t stick during the chilling process. Place the original Oreos into a food processor—don’t remove the cream filling. Pulse the cookies until they form fine crumbs. If you don’t have a food processor, an alternative method involves sealing the Oreos in a large resealable bag and crushing them with a rolling pin until finely crushed.
Next, add the softened cream cheese to the Oreo crumbs in the food processor. Pulse the mixture until well combined, creating a sticky dough. Using a tablespoon, scoop out the mixture and form it into 1-inch balls. Align these balls on your prepared baking sheet.
Chill and Coat
After rolling the truffles, place the baking sheet in the freezer for about 15 minutes. During this time, crush the additional three Oreos to use as a topping. Melt the candy melts or chosen chocolate according to the package instructions. Once melted, take the truffles out of the freezer and dip each one into the chocolate. Use a spoon to help coat them evenly and allow any excess chocolate to drip off.
Before the chocolate sets, sprinkle the tops with the crushed Oreos if desired. This adds an extra crunch and visual appeal. Allow the truffles to set completely at room temperature, or you can place them back in the fridge to speed up the setting process.
Store your delicious Oreo truffle balls in an airtight container in the refrigerator. These make for a perfect treat at gatherings or as a sweet snack at home. If you want a festive twist, try mixing in peppermint extract with the cream cheese for a delightful variation. For more delicious recipes, check out my Crockpot White Chicken Chili!
How to Prepare Oreo Truffle Balls:
Creating delicious Oreo truffle balls is an enjoyable and rewarding experience. With just a handful of ingredients, you can whip up this decadent treat in no time. Let’s dive into the detailed preparation steps to make your kitchen smell heavenly with these irresistible confections.
Gather Your Ingredients
Before starting, make sure you have all the necessary ingredients on hand. You will need 36 original Oreos, an 8 oz package of softened cream cheese, and either 16 oz of candy melts or your choice of melted chocolate, be it white, milk, or dark. You may also want 3 extra Oreos for decoration.
Step-by-Step Preparation
Begin by lining an 18 by 13-inch baking sheet with wax or parchment paper. This ensures that your truffle balls do not stick and can be easily removed later. Next, put the 36 Oreos in a food processor. Don’t worry about separating the cookie from the cream; both the cookie and filling are essential for flavor. Pulse until you achieve fine crumbs.
Then, add the softened cream cheese to the crushed Oreos. Pulse in bursts until the mixture is well combined. If you don’t have a food processor, you can crush the Oreos in a large resealable bag using a rolling pin. If you lack a mixer, simply blend the cream cheese into the cookie crumbs in a mixing bowl.
Using a tablespoon, scoop out the mixture and roll it into 1-inch balls. Lay these truffles on your prepared baking sheet. Once you finish shaping the balls, place them in the freezer for about 15 minutes. This solidifying step helps the truffles maintain their shape while dipping.
Meanwhile, crush the remaining 3 Oreos to use as a topping. Now, melt your candy melts or selected chocolate according to the package directions. After removing the truffles from the freezer, dip each ball in the melted chocolate. Use a spoon to drizzle extra chocolate over the top for a thicker coating.
Return them to the baking sheet and immediately sprinkle the tops with the crushed Oreos. Allow the chocolate to set before transferring the truffles to an airtight container. Store them in the fridge, where they can stay fresh for several days.
To elevate the flavors, consider trying a peppermint variation. Simply mix in peppermint extract with the cream cheese before combining it with the Oreo crumbs. This adds a festive twist, especially around the holidays. For an additional treat, try tasty recipes like Crockpot White Chicken Chili that perfectly complement your dessert.
Enjoy your homemade Oreo truffle balls and share them with friends and family for an unforgettable sweet experience!
Tips for Perfecting Your Oreo Truffle Balls:
Creating the perfect Oreo truffle balls is both an art and a science. These decadent treats delight family and friends, and a few key tips can ensure that your efforts result in scrumptious success.
Use Quality Ingredients
Start with high-quality Oreos; the classic flavor or any special edition can elevate the taste. Selecting fresh cream cheese is crucial too, as it binds the Oreos together and adds richness to your truffles. Remember, both ingredients have a significant impact on the overall flavor profile. If you’re in the mood for something different, try blending in some cream cheese from your favorite breakfast casserole recipes for a unique twist!
Crush with Care
Next, when crushing the Oreos, aim for a fine consistency. This step is essential; if the cookie pieces are too chunky, your truffles may not hold together. Use a food processor for uniformity, or place them in a sturdy plastic bag and crush them with a rolling pin. Either method will work, but the food processor tends to do a better job.
Achieve the Right Consistency
After mixing the crushed Oreos with cream cheese, check the consistency. It should be firm enough to roll into balls but soft enough to blend easily. If the mixture feels too wet, add a few more crushed Oreos, or if it’s too dry, incorporate a tiny splash of heavy cream until you reach the desired texture. This attention to consistency prevents crumbling and ensures that your homemade truffles are luscious and rich in flavor.
Chill Before Coating
Then, consider chilling the truffle mixture before rolling it into balls. Refrigerating it for at least an hour helps the mixture hold its shape during the rolling process. After forming the balls, chill them again before dipping them in chocolate. This step prevents the chocolate coating from melting on contact, allowing for a beautiful finish.
Experiment with Toppings
Lastly, don’t hesitate to personalize your Oreo truffle balls. Decorate them with drizzles of contrasting chocolate, crushed nuts, or a sprinkle of sea salt. Each topping contributes a unique flavor and texture, making your truffles even more enjoyable.
By following these tips, you’ll master the art of making Oreo truffle balls that are a hit at any gathering. For more delicious dessert inspirations, check out my Apple Cider Whoopie Pie Cookies with Caramel, which can perfectly complement your sweet creations!
Decorating Your Oreo Truffle Balls for Special Occasions:
Creating impressive and delicious treats can elevate any gathering, and oreo truffle balls fit this bill perfectly. Not only are they simple to make, but they also offer a fun canvas for decoration, allowing you to customize them for various celebrations. Whether you’re preparing for a birthday, holiday, or a casual get-together, here are some creative ideas to help you dress up your oreo truffle balls.
Colorful Chocolate Coatings
Start by choosing your favorite colors of melting chocolate or candy melts. For a festive vibe, use colors that match the theme of your event. For instance, red and green work wonders for Christmas, while pastel shades are perfect for spring celebrations. Dip your oreo truffle balls in the melted chocolate and allow them to set. Once they have hardened, you can drizzle contrasting colors over the top to create beautiful patterns. This not only adds visual appeal but also a delightful texture.
Edible Decorations
Next, incorporate fun edible decorations to make your truffle balls pop. Sprinkles, edible glitter, and even crushed nuts can enhance the look and appeal. For an extra special touch, consider topping them with mini chocolate chips or festive candy pieces. You can also attach a small piece of colored paper or a festive pick to each ball for a personalized touch. This idea is perfect for gatherings where children’s involvement is welcomed, as kids can choose their favorite toppings.
Presenting Your Treats
Presentation plays a key role in making your oreo truffle balls stand out. Arrange them on a decorative platter or in cupcake liners for a party-ready display. Consider using clear cellophane bags for individual servings, tied with a ribbon to match the theme. If you’re making these treats for a holiday gathering, like Thanksgiving, pair them with a delicious meal, such as a hearty crockpot chili recipe for a well-balanced feast.
In sum, decorating your oreo truffle balls for special occasions can be a fun and rewarding experience. With simple touches and a bit of creativity, you can create a stunning dessert that impresses guests and satisfies the sweet tooth. Explore more delicious recipes like cozy crockpot white chicken chili to complement your celebration further.
Storage Tips for Oreo Truffle Balls:
To keep your delicious oreo truffle balls fresh, storing them properly is essential. First, place the truffles in an airtight container, ensuring they do not stick together. You can layer them with parchment paper for added protection. Refrigerate your truffle treats, where they will stay fresh for up to two weeks. For longer storage, consider freezing them; just be sure to wrap each truffle individually in plastic wrap, then place them in a freezer-safe bag. When you’re ready to enjoy your sweet bites again, simply thaw in the refrigerator. For other delightful recipes, check out this Apple Cider Whoopie Pie Cookies with Caramel as a fabulous alternative dessert option!
Frequently Asked Questions (FAQs):
What are Oreo truffle balls made of?
Oreo truffle balls are crafted from crushed Oreo cookies and cream cheese, creating a delightful mixture that mimics traditional cake truffles. Once blended, the mixture is rolled into bite-sized balls and typically coated in chocolate for an indulgent finish. The combination of the rich, chocolatey cookies with a creamy center truly makes for an irresistible dessert treat.
How do I store Oreo truffle balls?
To maintain their freshness, you can store Oreo truffle balls in an airtight container in the refrigerator. It’s best to keep them chilled because the texture improves when they’re cold. They can last for about one week in the fridge, making them an easy make-ahead dessert for any occasion.
Can I customize Oreo truffle balls?
Absolutely! The beauty of Oreo truffle balls lies in their versatility. You can experiment with various Oreo flavors, such as golden or mint, to create unique twists. Additionally, consider mixing in different toppings like sprinkles, crushed nuts, or even drizzling them with colored chocolate for a festive touch.
Are Oreo truffle balls gluten-free?
Regular Oreo truffles are not gluten-free as standard Oreo cookies contain wheat. However, there are gluten-free Oreo options available in stores. Simply substitute regular Oreos with gluten-free versions to make a safe, delicious treat for those with gluten sensitivities.
Can I freeze Oreo truffle balls?
Yes, you can freeze Oreo truffle balls! They freeze well, and doing so is a great way to prepare for future events. To freeze, place the truffles in a single layer on a baking sheet, freeze them until solid, and then transfer to a freezer-safe container. They can be stored in the freezer for up to three months.
What can I serve with Oreo truffle balls?
These decadent treats pair wonderfully with a variety of desserts. For instance, serving them alongside a refreshing pasta salad, like a flavorful pasta salad with Italian dressing, can create a well-rounded dessert and snack table at parties or celebrations. Each bite of the sweet truffles complements the savory notes of the salad beautifully.
Print
Oreo Truffle Balls: A Sweet Treat You Can’t Resist!
- Total Time: 50
- Yield: 4 servings 1x
Description
Delightfully easy Oreo truffle balls are a perfect no-bake treat, combining the rich, creamy flavor of cream cheese with the iconic taste of Oreos, all dipped in chocolate for a decadent finish.
Ingredients
Scale
36 Oreos (original not doublestuf)
3 more crushed for topping if desired
1 (8 oz) package cream cheese
softened
16 oz vanilla or chocolate candy melts
or melted white chocolate
milk chocolate or dark chocolate
Instructions
- Line an 18 by 13-inch baking sheet with wax paper or parchment paper.
- Place 36 Oreos in a food processor (entire cookie, don’t remove cream filling) and pulse to fine crumbs.
- Add cream cheese and pulse in bursts until well combined.
- Scoop mixture out about 1 Tbsp at a time and form into 1-inch balls, then align on prepared cookie sheet.
- Place truffles in freezer for 15 minutes. Meanwhile, crush the remaining 3 Oreos.
- Melt almond bark or chocolate according to directions on package.
- Remove truffles from freezer and dip in melted chocolate, using a spoon to pour some chocolate over the top, then lift and allow excess chocolate to run off.
- Return to baking sheet, immediately sprinkle tops with crushed Oreos if desired, then allow chocolate to set.
- Store in an airtight container in refrigerator.
Notes
If you don’t own a food processor, place Oreos in a large resealable bag, seal the bag, and crush with a rolling pin until finely crushed. If you don’t own a mixer, you can blend the mixture in a mixing bowl with a spoon. For peppermint variation, mix 1 1/2 tsp of peppermint extract with cream cheese before adding Oreo crumbs.
- Prep Time: 20
- Cook Time: 30
- Category: Dessert
- Method: baking
- Cuisine: American
Nutrition
- Serving Size: 1 truffle
- Calories: 110 kcal
- Sugar: 9 g
- Sodium: 65 mg
- Fat: 7 g
- Saturated Fat: 4 g
- Unsaturated Fat: 3 g
- Carbohydrates: 11 g
- Fiber: 0.5 g
- Protein: 1 g
- Cholesterol: 10 mg
Keywords: oreo truffle balls, no-bake dessert, chocolate truffles, easy treats